Achieving tight tolerances in CNC milling is the practice of machining parts to extremely precise dimensional specifications with minimal deviation. This process is critical for industries like aerospace, medical, and robotics, where the exact fit and function of a component are non-negotiable. It requires a combination of advanced machinery, skilled operators, precise programming, and rigorous quality control to produce parts that meet exacting standards, often within a few micrometers of the target dimension.

Table of Contents
· What Exactly Defines a "Tight Tolerance" in Machining?
· Why is Unwavering Precision Critical in Today's Industries?
· The Foundational Elements of High-Precision CNC Milling
· State-of-the-Art Machinery: The Heart of Precision
· Material Characteristics: The Starting Point for Accuracy
· The Machining Process: Where Strategy Meets Execution
· Expertise and Quality Control: The Human Factor
· Navigating the Challenges of Close Tolerance Machining
· Which Sectors Rely on Precision-Milled Components?
· How to Identify the Right Partner for Precision Milling Projects
What Exactly Defines a "Tight Tolerance" in Machining?
In manufacturing, "tolerance" refers to the permissible limit of variation in a physical dimension of a part. It is the acceptable range between the maximum and minimum allowable size. While a standard tolerance for a non-critical component might be ±0.1 mm, a tight tolerance pushes this limit to a much finer degree, often falling into the range of ±0.025 mm (0.001 inches) down to a few micrometers (µm). Think of it as the difference between a bolt that loosely fits a hole and a precision bearing that must press-fit into its housing with perfect alignment and no play.
Achieving this level of precision is not a matter of simply adjusting a setting on a machine. It represents a fundamental capability built upon a holistic system of technology, process control, and expertise. The tighter the tolerance, the more challenging and resource-intensive the manufacturing process becomes, demanding a higher level of control over every variable involved.
Why is Unwavering Precision Critical in Today's Industries?
The demand for components with extremely tight tolerances is driven by the increasing complexity and performance requirements of modern technology. For many applications, precision is not just a preference; it is a prerequisite for safety, functionality, and reliability.
Consider a satellite component. A minute dimensional error could lead to misalignment of sensitive optics or a failure in a critical mechanism, jeopardizing a multi-million dollar mission. In the medical field, a surgical instrument or an implantable device must be machined with absolute accuracy to ensure it functions correctly and is safe for the patient. In high-performance automotive engines, the clearance between moving parts is precisely controlled to maximize efficiency and power output while minimizing wear. In all these cases, precision ensures interoperability, performance, and safety. As assemblies become more complex and components become smaller, the margin for error shrinks, making tight tolerance machining an indispensable capability.
The Foundational Elements of High-Precision CNC Milling
Attaining excellence in close tolerance machining is not the result of a single factor but the synergy of multiple interdependent elements. A workshop cannot produce high-precision parts simply by investing in one good machine. Instead, it requires a comprehensive approach that integrates state-of-the-art equipment, deep material knowledge, meticulous process engineering, and human expertise. These foundational pillars work in concert to control the hundreds of variables that can influence the final dimensions of a milled component.
State-of-the-Art Machinery: The Heart of Precision
The capability of the CNC machine itself is the bedrock of precision work. Without a stable, accurate, and advanced machine tool, achieving tight tolerances is impossible.
The Leap from 3-Axis to 5-Axis Milling

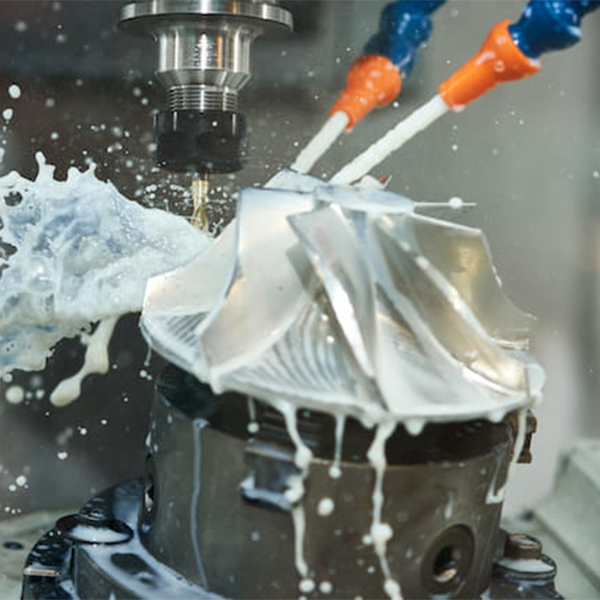
While traditional 3-axis CNC machines are workhorses for many applications, 5-axis machining centers represent a significant leap forward for precision. By allowing the cutting tool to approach the workpiece from five different directions simultaneously, these machines can create highly complex geometries in a single setup. Each time a part is removed and re-fixtured, the risk of positional error increases. By minimizing or eliminating these setups, 5-axis milling inherently improves accuracy. Service providers specializing in rapid prototyping and low-volume production, such as Advanced CNC Milling Services, leverage 5-axis technology to produce intricate parts with exceptional precision and superior surface finishes.
Machine Rigidity and Thermal Stability
The physical construction of a CNC machine plays a vital role. High-end machines designed for tight tolerance work feature heavy, rigid frames, often made from cast iron or polymer concrete, to dampen vibrations that can spoil a cut. Even the subtle vibration from a nearby machine can affect accuracy. Furthermore, the heat generated by the spindle, motors, and the cutting process itself can cause the machine's components to expand and contract, leading to dimensional drift. Advanced machines incorporate thermal compensation systems, including cooled spindles and ball screws, to maintain dimensional stability throughout long machining cycles.
Material Characteristics: The Starting Point for Accuracy
The material being machined is not a passive element; its properties directly influence how it responds to the cutting process. A successful outcome depends on a deep understanding of material behavior.
Machinability of Metals and Plastics
Different materials have varying levels of "machinability." Hardened steels and exotic alloys like Inconel are tough and generate significant heat and tool wear, making them challenging to machine accurately. Softer materials like aluminum are easier to cut but can be prone to burring and may have lower dimensional stability. Engineering plastics like PEEK or Delrin require specific cutting strategies to avoid melting or internal stress buildup. An expert machinist will select cutting parameters—speed, feed rate, and depth of cut—that are perfectly tailored to the specific material and its condition.
Thermal Expansion and Internal Stresses
Every material expands and contracts with changes in temperature. This property, known as the coefficient of thermal expansion (CTE), is a critical consideration. The heat from the cutting tool can cause the workpiece to expand during machining, only to contract as it cools, resulting in an undersized part. Skilled machinists use flood or mist coolants and optimized toolpaths to manage heat. Additionally, raw material stock can contain internal stresses from its manufacturing process. Machining can release these stresses, causing the part to warp. Techniques like roughing, stress-relieving heat treatment, and then finish machining are often employed to counteract this effect.
Material | Coefficient of Thermal Expansion (μm/m·°C) | Machining Considerations |
Aluminum (6061) | 23.6 | High expansion; requires effective cooling. |
Stainless Steel (304) | 17.3 | Work hardens; requires sharp tools and rigid setup. |
Titanium (Ti-6Al-4V) | 8.6 | Poor thermal conductivity; heat concentrates at the tool. |
PEEK | 47 | Very high expansion; prone to stress and melting. |
Invar | 1.2 | Extremely stable; ideal for precision instruments. |
The Machining Process: Where Strategy Meets Execution
A perfect machine and a stable material are not enough. The strategy behind the cut—the programming and setup—is where precision is truly forged.
Advanced Tooling and Tool Path Optimization
The cutting tool is the only thing that touches the part. Its quality, geometry, and coating are paramount. For tight tolerance work, machinists use high-performance solid carbide end mills with specific coatings (e.g., TiAlN or AlCrN) to resist wear and manage heat. Computer-Aided Manufacturing (CAM) software is used to generate intelligent toolpaths that optimize cutting forces, minimize tool deflection, and ensure consistent material removal. Strategies like high-speed machining (HSM) use lighter depths of cut at much higher feed rates to reduce heat and stress on the part.
The Critical Role of Workholding and Fixturing
How the workpiece is held is as important as how it is cut. Any movement, however small, will translate directly into an error. For high-precision milling, standard vises may not be sufficient. Custom fixtures, vacuum chucks, or precision modular workholding systems are often used to secure the part with absolute rigidity and without distorting its shape. The design of the fixture must also provide adequate clearance for the cutting tool to access all necessary features, reinforcing the benefits of 5-axis machining.
Expertise and Quality Control: The Human Factor
Ultimately, technology is a tool, and its potential is only realized in the hands of an expert. Human skill and rigorous verification processes are the final arbiters of quality.
The Skill of the Machinist and Programmer
An experienced machinist understands the subtle interplay between the machine, material, and tooling. They can "read" the machine, listening for signs of tool wear or vibration and adjusting parameters in real-time. They know when to use a roughing pass to remove bulk material and a fine finishing pass to achieve the final dimension and surface finish. The CAM programmer, in turn, must translate the design intent into flawless machine code, anticipating and compensating for potential issues before the first cut is ever made.
Rigorous Inspection and Verification
You cannot guarantee what you cannot measure. A robust quality assurance process is non-negotiable for tight tolerance work. This goes beyond using calipers and micrometers. Climate-controlled inspection labs equipped with Coordinate Measuring Machines (CMMs) are used to verify part dimensions against the CAD model with sub-micrometer accuracy. Optical scanners and profilometers may be used to check complex surfaces and finishes. A commitment to a certified Quality Management System, such as ISO 9001, demonstrates that a provider has formalized, repeatable processes in place to ensure consistent quality from the first part to the last. This certification is a hallmark of a reliable partner dedicated to precision.
Navigating the Challenges of Close Tolerance Machining
The path to precision is fraught with potential obstacles. Overcoming them requires anticipation and strategic intervention. Key challenges include tool wear, which can gradually alter part dimensions; part deflection, especially on thin-walled features; burr formation, which can affect fit and function; and vibration or "chatter," which ruins surface finish and accuracy. Top-tier machine shops combat these with in-process tool monitoring, adaptive machining strategies that adjust to cutting forces, specialized deburring passes, and harmonic analysis to find stable "chatter-free" spindle speeds.
Which Sectors Rely on Precision-Milled Components?
The need for unwavering accuracy makes tight tolerance CNC milling essential across a range of advanced industries:
· Aerospace & Defense: For turbine blades, avionics housings, structural components, and missile guidance systems where failure is not an option.
· Medical & Healthcare: For surgical instruments, orthopedic implants, and components for diagnostic equipment that require biocompatibility and perfect functionality.
· Automotive: Especially in high-performance and electric vehicles for engine components, transmission parts, and battery housings.
· Robotics & Automation: For robotic arm components, end-effectors, and actuator housings that demand precise movement and assembly.
· Electronics: For heat sinks, connectors, and enclosures for sensitive devices that require both thermal management and exact fits.
How to Identify the Right Partner for Precision Milling Projects
When your project demands the highest level of precision, choosing the right manufacturing partner is a critical decision. Look for a provider who can demonstrate a comprehensive mastery of all the elements required for success. Your evaluation should focus on several key areas:
First, assess their technological capabilities. Do they have a fleet of modern, well-maintained CNC machines, including 3-, 4-, and 5-axis centers? The availability of 5-axis technology is often a strong indicator of a commitment to handling complex, high-precision work. Second, inquire about their quality management system. A certification like ISO 9001 provides objective evidence of a disciplined and systematic approach to quality control, from material receiving to final inspection with CMMs. Third, review their experience and expertise. Ask for case studies or examples of similar parts they have produced with tight tolerances in your industry or with your chosen materials. A partner like Boen Rapid, with a portfolio of advanced 5-axis machines and a steadfast commitment to ISO 9001 quality standards, provides the engineering support and production assurance needed for the most critical components. They combine technological strength with deep material and process knowledge to turn challenging designs into a tangible, precise reality.


